Tutorial · Step 4 of 6
Importing Media & Building Your Edit
Importing files into Parapheonix is instant — files are loaded directly into your browser memory and are never stored on our servers until you hit Render. Here's how to go from empty timeline to a finished edit.
Importing files
There are two ways to import media into the editor:
1
Drag and drop
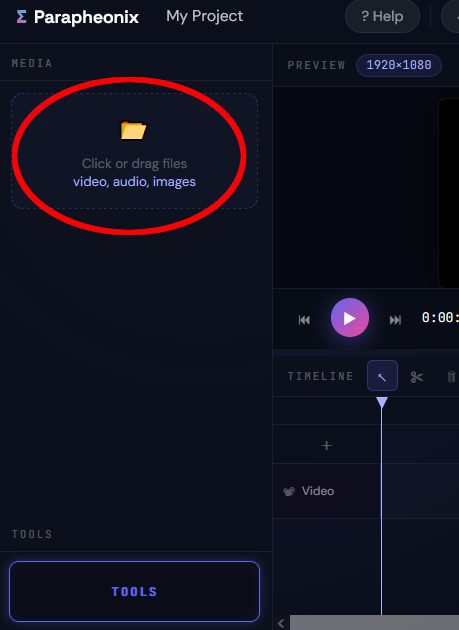
Drag one or more files from your file manager and drop them onto the Media panel on the left, or anywhere on the editor window. Multiple files can be dropped at once.
2
Click to browse
Click the dashed upload zone in the Media panel to open a file picker. Supported formats: MP4 MOV MKV WebM AVI MP3 WAV AAC FLAC PNG JPG. Max 100 MB per file.
Files stay in your browser. Imported media is held as a local blob URL and is never uploaded to our servers — only the final render sends data to the backend. This makes import instant regardless of file size.
Working with the timeline
Once files appear in the Media panel, you can build your edit on the timeline below the preview.
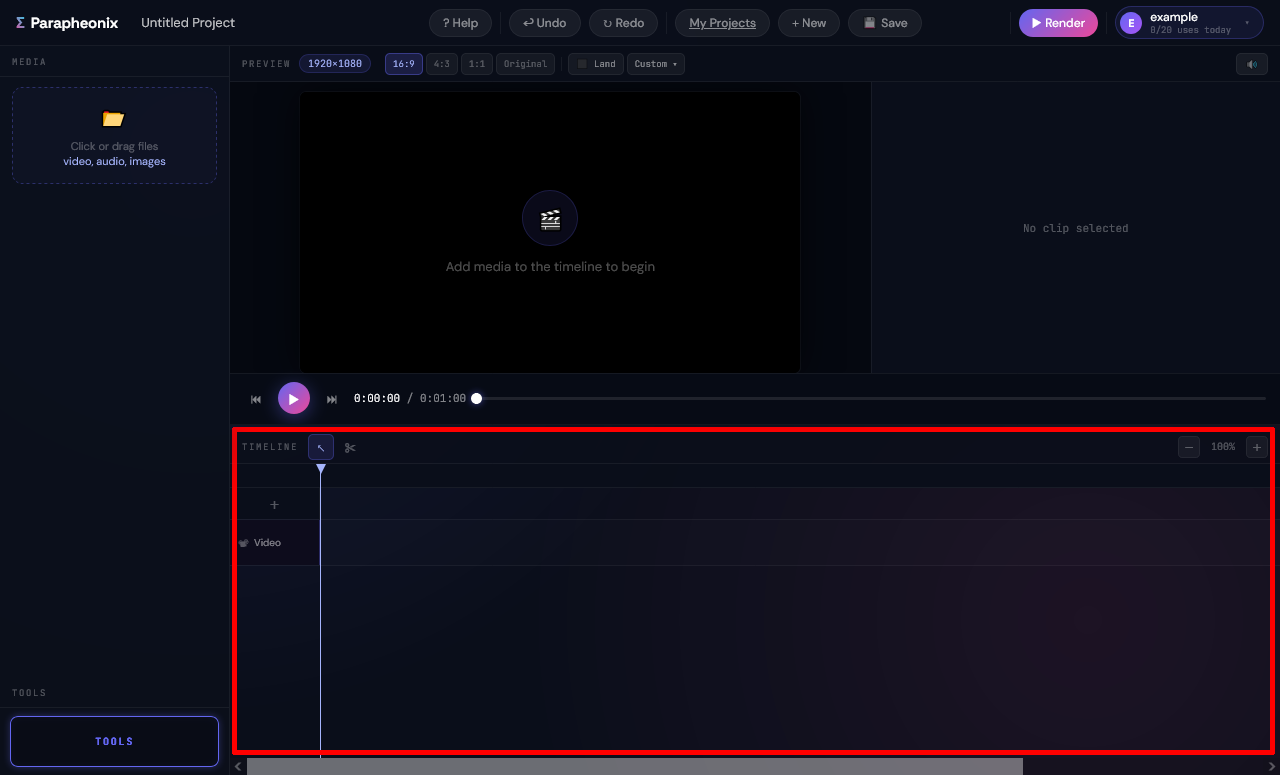
The timeline — clips on tracks, playhead, trim handles, and zoom controls
1
Drag a clip onto a track
Drag any item from the Media panel onto the Video track (or any other track). The clip snaps into position on drop.

2
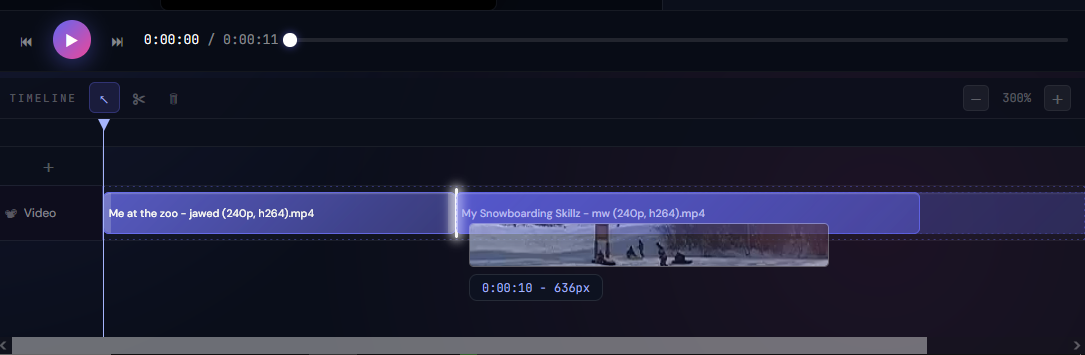
Move clips
You can re-order and rearange your elements, drag a clip left or right to reposition it in time. Other clips shift to make room.
3
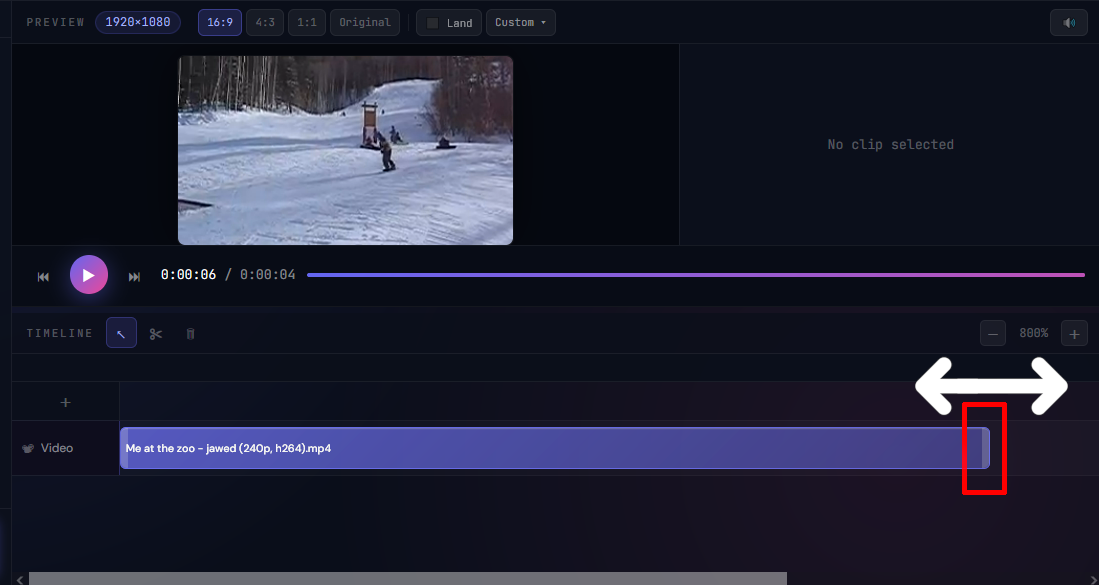
Trim clip edges
Hover over the left or right edge of a clip — the cursor changes to a resize arrow. Drag inward to trim the clip without affecting neighbours.
4
Split a clip
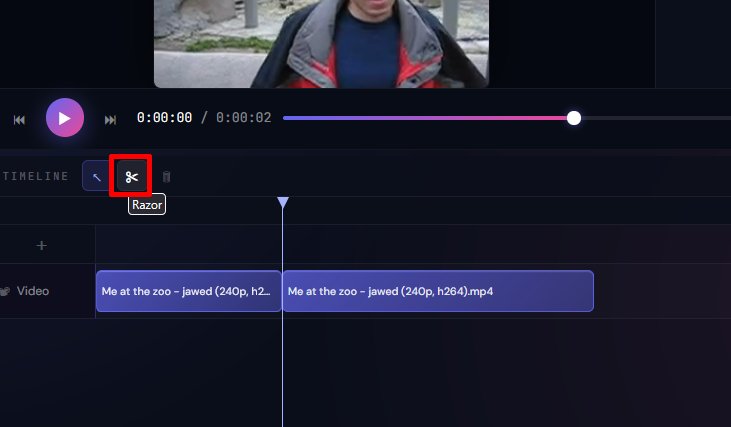
Switch to the Razor tool (C), position the playhead where you want to cut, then click the clip to split it into two independent clips.
5
Add more tracks
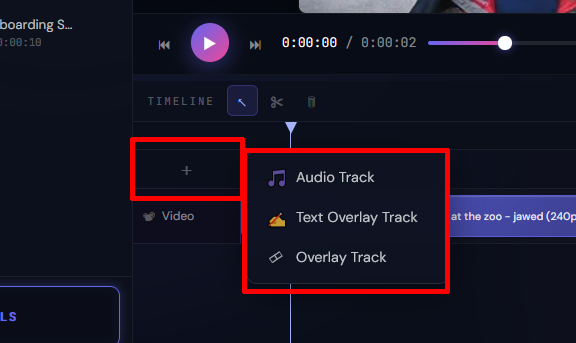
Click the + button on the left of the timeline to add an Audio, Text Overlay, or Video Overlay track on top of your main footage.
6
Select for more options
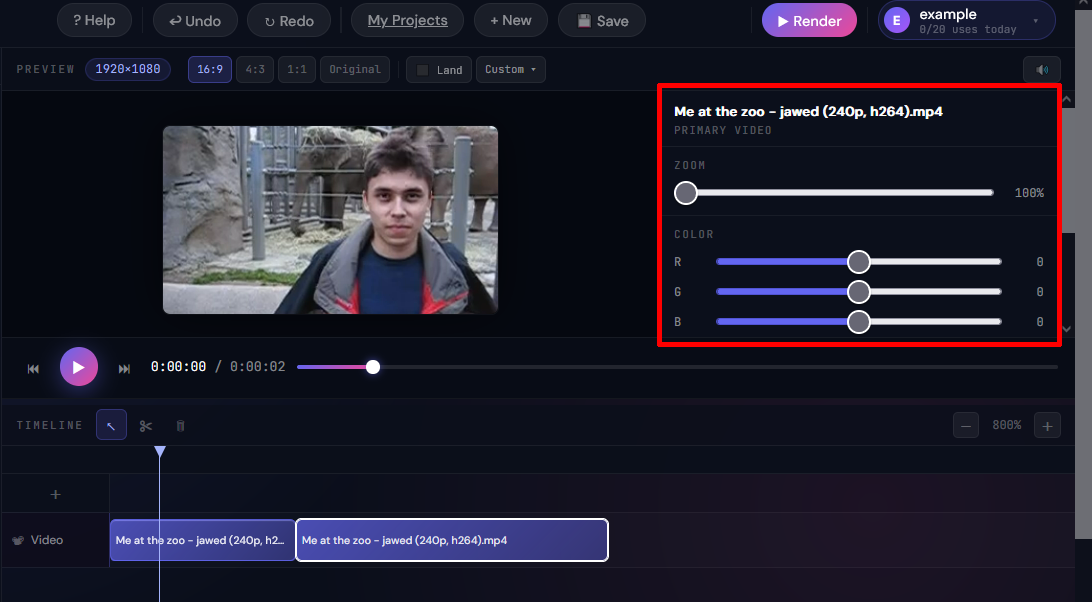
Selecting any element opens a context menu with options to delete, duplicate, and adjust clip properties like opacity, speed, and colour grading.
Unlimited undo. Every change to the timeline is undoable. Press Ctrl Z as many times as needed to step back through your edit history.
Supported formats and file size limits
Before importing, make sure your files are within the accepted format and size limits. Files over the 100 MB limit need to be made smaller on your device first — for example by trimming them or re-exporting at a lower resolution.
✓
Accepted video formats
MP4 MOV MKV AVI are the most widely compatible formats and are recommended. WebM files can be imported and placed on overlay tracks but the main video track performs best with MP4 or MOV source files.
✓
Accepted audio and image formats
Audio: MP3 WAV AAC FLAC OGG. Images: PNG (including transparent) and JPG. Images are placed as overlay clips and displayed for the duration you set on the timeline.
Tips for a smooth edit
💡
Match frame rates between clips
When mixing clips of different frame rates (e.g. 24 fps and 60 fps) on the same video track, the output frame rate is determined by your render settings. For the smoothest result, convert all source clips to a consistent frame rate using the Format Converter before editing.
💡
Keep source files available until render
Imported media is stored as a browser blob — it lives in memory while the editor tab is open. If you close and reopen the editor with a saved project, you will need to re-import your media files before rendering. This is expected behaviour and does not affect the saved timeline structure.
💡
Use the razor tool for precise cuts
For frame-accurate cuts, zoom the timeline all the way in using the + button, position the playhead exactly on the frame you want to cut, then press C to switch to the razor tool and click the clip. At high zoom levels you can see individual frames.
💡
Right-click clips for extra options
Right-clicking a clip on the timeline opens a context menu with options to delete, duplicate, or adjust properties like speed, opacity, and colour grading. These options are not available through the toolbar.